Thursday, March 31, 2011

No Booze, No Desserts!

photo credit: http://bear-ingitall.blogspot.com

I wanted to give my (maybe midway?) check-up on how I'm doing without alcohol and processed sugar in my life.

I started this journey on Ash Wednesday (which was March 9th) and after the initial shock of a few days sans booze or dessert, my body was loving it! It's been almost a month now and this recalibration experiment has opened by eyes a bit.

First, the alcohol. In my mind, it's never a good time to give up alcohol...there will always be events to go to and drinking people to be around. For us, that comes in the form of a Shabbat dinner, the Tribe home opener, Brandon's birthday and a wedding. Still, the onset of spring is a perfect time to let my body detox and re-energize for the warmth that is coming.

Some of the high points for me have been:

  • Not having to worry whether or not I am going to wake up  with "fuzzy alcohol brain" or a mean hangover.
  • The rational decision-making part of my brain is never inhibited (hmm, that's arguable...we'll say never inhibited due to alcohol) especially with respect to questions like "Do I really want to finish this entire quart of ice cream?"
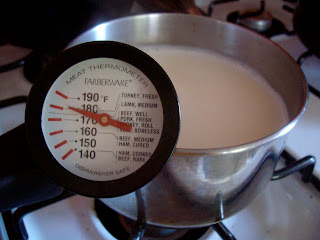
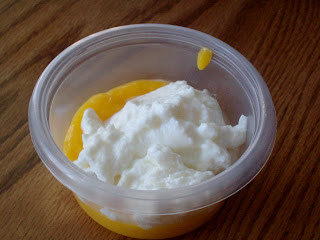
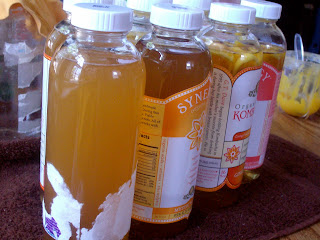
  • Getting a ton of use out of our juicer!
  • Lazy Sundays have morphed into productive Sundays because there is no liquor to lazy them up.
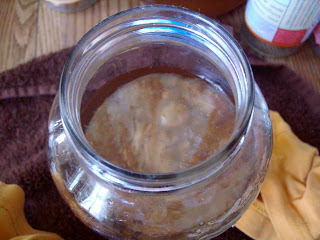
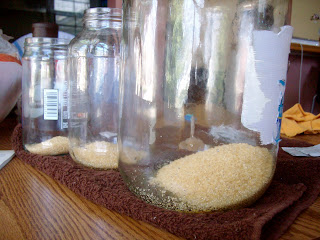
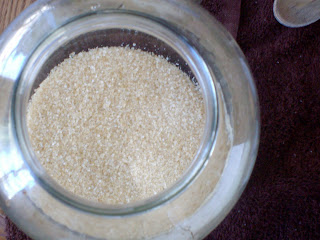
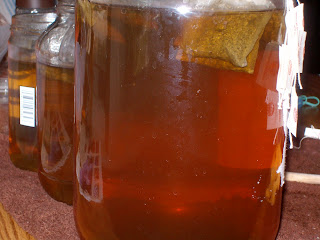
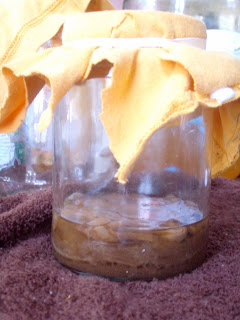
  • Kombucha. Enough said. 
Given that, there have been a few instances where I wanted to enjoy a liquid libation or two, but passed up the opportunity, to my slight chagrin.  I've been struggling with where I am going to go from here...what will I do after Easter? The Cleveland Marathon is about 3 weeks after Easter and generally, when I run big races like this I stop drinking a few weeks out (I guess it just brings me back to my lacrosse days, and the 48 hour rule) it's just something I've always done. So, I think I'm going to continue the no drinking rule until after the race. Race time is no time to change habits! 

After that, I'm ready to seriously change my drinking habits. I love good beer, I love wine, I plan to drink it to enjoy it but not necessarily to catch a buzz. That...and water is my friend. 

photo credit: http://thenakedhero.com

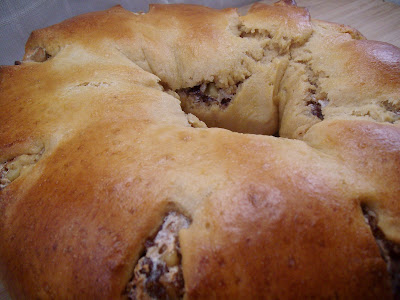
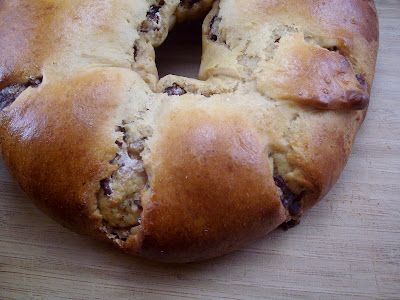
Now, onto desserts. To be honest, this has been tougher for me than giving up booze. I love me some cookies and could probably house an entire box of them if given the chance. In fact, it's certainly been done before. Not drinking has definitely helped me stay away from those sugars though. Lowered inhibitions generally means justifying ample trips to the dessert table.


Although I really think cutting desserts out of my diet has given my body the chance to truly detox and reset itself, I have come to the conclusion that it's almost impossible to cut all processed sugar out of my diet. Just about everything I could possibly buy at the grocery store has processed sugar in it. I guess my quest here is to minimize and balance it.

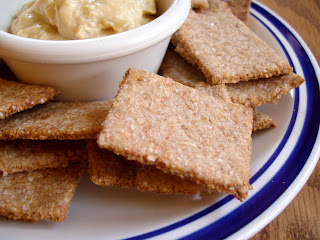
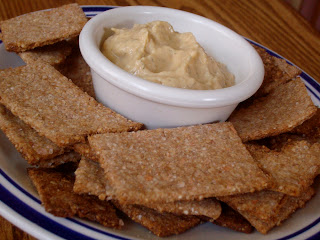
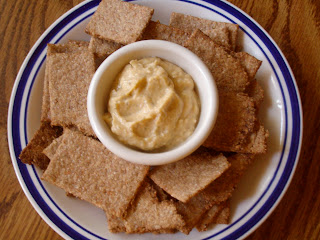
I stumbled across this post today and watching that video that Jessica posted really hit home for me. I don't drink a lot of soda or eat a ton of pop tarts, but those things do cross my plate every now and then and I didn't realize the affect it might be having on me. So, as I continue down this path of weeding processed sugars out of my diet, I'm going to make a more concerted effort to skip things with added or processed sugars that are not necessarily in the dessert food group (store bought chips and tortillas come to mind right now as as a place to watch for extra sugars).  I think I can do a better job with using natural sugars like honey and agave in things that I make at home as well...although, kombucha doesn't count...the yeasties eat all the sugar anyway and my SCOBYs are not friends with honey.

I'm not going totally primal on you guys, I'm just working towards a better balance.

I also want to touch on a few of the other things I've been exploring during this recalibration.

Daily use of the neti pot. Love, love LOVE it! I honestly don't even know all the purported health claims that come with a neti pot, but I love cleansing your sinuses and then blowing a great snot rocket into the sink at the end. I can see this being especially useful when I start getting allergies (which, by the way, I NEVER had until I moved to Ohio...weird).

Daily dry rub. I usually use my dry loofa right before I get into the shower to brush off the day's muck along with any dead skin lingering around. It's very refreshing and I sometimes find that I don't have to use as hot water as I normally would like, because my skin is more sensitive. Supposedly, it stimulates your lymphatic system too, which is good for me right now because I am currently fighting something off.

Meditation. I am going through this 40-day kundalini kriya...basically a daily meditation based on breath and heart awareness. Meditation has always been something that is difficult for me and I have been doing some of my meditations on my lunch break which isn't always the best environment to practice in. Regardless, I will continue to practice because I can physically feel a difference in my attitude towards work after a short meditation. So, it can only be doing good for me.

Almost daily yoga practice.
doyogawithme.com
iyogalife.com
yogajournal.com
youtube.com - I just discovered how to set up a playlist and play multiple videos in a row: get an account, make a "playlist" and search for yoga videos!
yogadownload.com

So, overall the things that I've given up for Lent have become a good opportunity for a little self-exploration and some [bonus!] productivity. I'm really looking forward to taking the things I've been learning into my life in a non-restrictive fashion.

Happy Day-Before-The-Tribe-Home-Opener Day!

Wednesday, March 30, 2011

Homebrewed Kombucha

You have until 11:59 pm EST tonight to enter my Happy Herbivore Cookbook giveaway! Take advantage of some awesome, vegan, fat-free/low-fat recipes while you still can!
~ ~ ~ ~ ~


Alright, people! I'm going to let you in on the secrets of one of my new favorite "make at home instead of buy" things.

Homebrewed Kombucha

Let me just start by saying that a bottle of GT's Kombucha from the store will run you anywhere between $3.50 - $4.50 a bottle. Our basement pantry has upwards of 20 bottles (that we're reusing to bottle our own) in it. So, doing the math, we've spent at least a whopping $70 on Kombucha. 

I think I can do better things with my money, don't you?

Kombucha manufacturers make a lot of health claims (all of which I take with a grain of salt because of my experience with the FDA and how they determine if a product is safe and effective) but I am basing my love for this life elixir totally on experience. I invite you to do your own research and taste a few different kinds before making any rash decisions on the stuff (remember, it can be an acquired taste) but here is some of the healthiness that you'll find in a properly brewed batch:

  • Vitamin C
  • Vitamin B
  • Lactic acid
  • various amino acids
  • various metabolic enzymes
...and a host of potential benefits (direct from kombuchakamp.com):
  • contain probiotics
  • assist to alkalinize the blood
  • detoxify the liver
  • increase metabolism
  • improve digestion
  • alleviate constipation
  • cancer prevention
  • reduce blood pressure
  • relieve headaches & migranes
  • aid healthy cell regeneration
  • reduce kidney stones
  • high in polyphenols
  • improve eyesight
  • reduce excema – softens the skin
  • prevent artheriosclerosis
  • speed healing of ulcers
  • reduce gray hair
  • help clear up candida & yeast infections
  • boost energy – helps with chronic fatigue
  • high in antioxidants – destroy free-radicals that cause cancer
  • rebuild connective tissue – helps with arthritis, gout, asthma, rheumatism
Remeber, most of these claims have not been evaluated by the FDA. In my personal experience, I just like the way it tastes, I like the "natural effervescence", and I like the way it makes me feel!!   

So, by arming ourselves with all the awesome information on kombuchakamp.com, Brandon and I set out to get a Kombucha mother (or culture, or SCOBY) and start brewing our own "booch".

We purchased our first SCOBY from Cultures for Health, but you can also get cultures, and even entire brewing kits at Kombucha Kamp. The SCOBY looks pretty gross (see below) but it's full of life! SCOBY stands for Symbiotic Culture Of Bacteria and Yeast.


Here's what you need to start brewing your own booch: 
  • a glass jar or other glass or oak brewing vessel (my advice? Start with a quart sized jar, then go bigger), sterilized
  • 1 cup starter - either commercially sold kombucha or raw apple cider vinegar
  • 1 cup sugar (preferably organic, we like to keep our kombucha clean)
  • 2-4 tea bags green, black, oolong, or english breakfast tea...NO HERBALS! If you have loose leaf tea, 1 tsp = 1 tea bag
  • 4 cups good ol' H2O
  • a mama SCOBY
  • a cloth cover, old clean t-shirts work well, but cheesecloth is too porous and will let crap into your brew. Coffee filters are also good for this
  • a rubber band

...aaand directions to make a batch:

  • boil 4 cups of water
  • add sugar, hot water and tea bags to the brewing vessel, leaving a few inches at the top for breathing room

  • let the sweet tea come to room temperature before proceeding, you can either put it in the fridge or add some cold water to the mix if you are impatient
  • when the tea is (finally) at room temp, you can add your starter and SCOBY to the mix
  • cover the top of the jar with your cloth and secure it with a rubber band
  • set in a warm location, out of direct sunlight
  • DO NOT DISTURB for 7 days
  • after a week, taste your kombucha to see if the flavor is to your liking. If it's too tart, reduce the brewing time for the next batch. If it's too sweet extend brewing time (you can leave it up to 30 days). Taste it every day until you reach the best flavor according to your preference
  • Bottle and (if you want to) flavor the kombucha and start your next batch
For me, brewing kombucha at home was definitely a learning experience. We lost a few SCOBYs to mold (boo!) and it took a few trials to determine where the best place in our house to brew was. A few take home notes: 
  • In most cases, your SCOBY will have a baby with every new batch. If you end up with more SCOBYs than brewing vessels, start a SCOBY hotel (see picture below). A SCOBY hotel is really just another clean jar, filled with a little bit of kombucha and all your extra SCOBYs. We also found this very helpful if you loose any batches to mold!
  • Seriously, make sure you don't touch the brewing vessel for at least a week. The new baby SCOBYs are very delicate and don't like to be disturbed.
  • Keep the brew warm! I'm talking 65-85 degrees. Most of the good places to keep the kombucha while it's brewing in our house is AT MOST 60 degrees in the winter - no good. This can definitely invite mold growth and stagnated brewing. It's like putting your booch in the fridge. We remedied this by purchasing a kombucha heater - it was the absolute best purchase we could have made. Now we get delicious, yeast-y brews every time and very healthy new SCOBYs
  • Absolutely, 100% throw away any kombucha that has mold on it. Do not pass go. Do not collect $200. 
Besides that, brewing our own kombucha has been an absolute blessing on my wallet (even if there were a few "capital" investments to begin with). Not only that, it's bringing me closer to the source of my food...er, my kombucha. I know exactly what goes into it and can control every step of the process.

Oh and one last note; if you're in the Cleveland area and want to start brewing...we have extra SCOBYs if you'd rather not purchase one! Just get in touch!!

Peace, Love & Bagels,


Monday, March 28, 2011

Marathon Monday: Training Week #12

Have you entered my Happy Herbivore Cookbook giveaway yet??? You can enter until Wednesday!

Last week was a wonderful week in running but a not-so wonderful week in cross-training.

photo credit: http://www.emotion-potions.com

Let's start by talking about yoga. I've been trying to practice everyday on my lunch break, but my office is less than yoga-friendly. For a while I was practicing in the document room - which is just a room where we keep all our old paperwork, since the room is fireproof. It's the only place that is semi-private and has the room to move a bit. It's apparently not private enough because I got walked in on mid-uttanasana (forward fold) which was WAY AWKWARD! So the next day, I moved into our shower room, which is approximately 6" long by 3" wide. Good thing I'm not very tall (a towering 5"0' thank you very much!). The shower room worked out okay and I can just lock myself in and be alone with the hum of the machines in the prototype shop right outside the door. Finally, I figure no one will be around Friday afternoon, so I can practice in the document room again, without being bothered...

So I bring all of my things into the room, lock the door, then decide I want to go get my water bottle. When I return with aforementioned bottle, I find myself locked out...and my yoga mat, clothes and computer locked IN.

So much for that. 


I have a new hope for yoga this week and lots of new videos to try (I am currently having "yoga block" when I make up my own practice...I need some new ideas). That is going to start today with some yoga cross-training via doyogawithme.com (got that idea from Maria - thanks!!)

Last week, we successfully ran our first 14-miler of the season (and Brandon's longest run EVER). The highly of my running last week was our tempo run. Our "smart coach" called for a 6 mile run, with a mile warm-up, for miles at a 9:21 pace, followed by a mile cool-down.

I was worried about the pace, to be perfectly honest. But, once we got out there I had to keep asking Brandon if he felt like we were running slow. I was actually comfortable running at a 9:21 pace! WHAT?!?! We ended up running the middle four miles faster than that, because it just felt right. I think we both felt really strong at the end of that run!

This week in running...


Hopefully we'll get out for a bike ride one of these days and then FRIDAY IS THE TRIBE HOME OPENER!!! It's only the best day of the year!


Spring, my friends, has finally sprung!

Peace, Love & Bagels,

Sunday, March 27, 2011

Daring Bakers: Meringue Filled Coffee Cake


I normally don't post on the weekends, but this is a special event for me...another Daring Bakers challenge.

Last time, I tried my hand at Panna Cotta with marginal success. This time we're talking serious coffee cakery which I would name an uber success! This month's challenge was brought to us by Jamie and Ria (and the letter C) who decided on a yeast-risen coffee cake/nut roll.

I brought mine into the office for a coworker's birthday and it was a big hit! Unfortunately, I'm not eating desserts in observance of Lent, so other people's opinions will have to do for the time being. I do plan on re-making this cake for Easter so it can be enjoyed by yours truly!


Meringue Filled Coffee Cake
Makes two cakes, about 10" in diameter

for the dough:
  • 4 cups (600 g / 1.5 lbs.) flour
  • ¼ cup (55 g / 2 oz.) sugar
  • ¾ teaspoon (5 g / ¼ oz.) salt
  • 1 package (2 ¼ teaspoons / 7 g / less than an ounce) active dried yeast
  • ¾ cup (180 ml / 6 fl. oz.) whole milk
  • ¼ cup (60 ml / 2 fl. oz. water (doesn’t matter what temperature)
  • ½ cup (135 g / 4.75 oz.) unsalted butter at room temperature
  • 2 large eggs at room temperature
for the meringue:
  • 3 large egg whites at room temperature (use the yolks + a bit of water for an egg wash before baking)
  • ¼ teaspoon salt
  • ½ teaspoon vanilla
  • ½ cup (110 g / 4 oz.) sugar
for the filling:
  • cup (110 g / 4 oz.) chopped pecans or walnuts
  • 2 Tablespoons (30 g / 1 oz.) granulated sugar
  • ¼ teaspoon ground cinnamon
  • 1 cup (170 g / 6 oz.) semisweet chocolate chips or coarsely chopped chocolate
directions:

Prep the dough - In a large mixing bowl, combine 1 ½ cups (230 g) of the flour, the sugar, salt and yeast.

In a saucepan, combine the milk, water and butter and heat over medium heat until warm and the butter is just melted. 

With an electric mixer on low speed, gradually add the warm liquid to the flour/yeast mixture, beating until well blended. Increase mixer speed to medium and beat 2 minutes. Add the eggs and 1 cup (150 g) flour and beat for 2 more minutes.

Using a wooden spoon, stir in enough of the remaining flour to make a dough that holds together. Turn out onto a floured surface (use any of the 1 ½ cups of flour remaining) and knead the dough for 8 to 10 minutes until the dough is soft, smooth and elastic, keeping the work surface floured and adding extra flour as needed.

Place the dough in a lightly greased (I use vegetable oil) bowl, turning to coat all sides. Cover the bowl with plastic wrap and a kitchen towel and let rise until double in bulk, 45 – 60 minutes. The rising time will depend on the type of yeast you use.

Prep your filling - In a small bowl, combine the cinnamon and sugar for the filling if using. You can add the chopped nuts to this if you like, but I find it easier to sprinkle on both the nuts and the chocolate separately.

Make the meringue - In a clean mixing bowl – ideally a plastic or metal bowl so the egg whites adhere to the side (they slip on glass) and you don’t end up with liquid remaining in the bottom – beat the egg whites with the salt, first on low speed for 30 seconds, then increase to high and continue beating until foamy and opaque. Add the vanilla then start adding the ½ cup sugar, a tablespoon at a time as you beat, until very stiff, glossy peaks form.

Assemble the cakes - Line 2 baking/cookie sheets with parchment paper.

Punch down the dough and divide in half. On a lightly floured surface, working one piece of the dough at a time (keep the other half of the dough wrapped in plastic), roll out the dough into a 20 x 10-inch (about 51 x 25 ½ cm) rectangle. Spread half of the meringue evenly over the rectangle up to about 1/2-inch (3/4 cm) from the edges. Sprinkle half of your filling of choice evenly over the meringue (ex: half of the cinnamon-sugar followed by half the chopped nuts and half of the chocolate chips/chopped chocolate).

Now, roll up the dough jellyroll style, from the long side. Pinch the seam closed to seal. Very carefully transfer the filled log to one of the lined cookie sheets, seam side down. Bring the ends of the log around and seal the ends together, forming a ring, tucking one end into the other and pinching to seal.

Using kitchen scissors or a sharp knife (although scissors are easier), make cuts along the outside edge at 1-inch (2 ½ cm) intervals. Make them as shallow or as deep as desired but don’t be afraid to cut deep into the ring.

Repeat with the remaining dough, meringue and fillings.

Cover the 2 coffee cakes with plastic wrap and allow them to rise again for 45 to 60 minutes.

Preheat the oven to 350°F (180°C).

Brush the tops of the coffee cakes with the egg wash. Bake in the preheated oven for 25 to 30 minutes until risen and golden brown. The dough should sound hollow when tapped.


This seems like an awful lot of work, but the resulting cake (actually, nut roll is a more accurate term) is beautiful. I got a lot of positive feedback from the eaters of this cake so I'm just going to relay that to you.  Like I said, I will be re-making this for Easter, when I can indulge in the decadence and deliciousness that is this beautiful coffee cake. 

Do you have a favorite coffee cake recipe?

Peace, Love & Bagels,


Friday, March 25, 2011

The First EVER PL&B Giveaway!

It's a double post Friday!

I have some great news for my readers! You've officially stumbled upon the very first Peace, Love & Bagels giveaway!!

Hopefully you've had the chance to read my interview with Lindsay of Happy Herbivore. She just released her very first cookbook of all vegan, low-fat or fat-free recipes and is doing a blog book tour to promote the book. I am a big fan of her recipes and have tried several of them...and now you can too! 

The folks at BenBella Books got in touch with me last night to let me know that they want to offer my readers a free copy of Lindsay's book: The Happy Herbivore Cookbook!


You've got a few different opportunities to enter, each must be a separate comment and the winner will be picked via random.org
  1. Leave a comment telling me what your favorite vegan substitute is (mine is flax eggs for real eggs! 1 tbsp flaxseeds mixed with 3 tbsp water)
  2. Like Peace, Love & Bagels on Facebook (still comment if you already like PL&B)
  3. Like Happy Herbivore on Facebook (again, comment if you already like it)
  4. Tweet the following: "I just entered the @peacelovebagels Happy Herbivore Cookbook giveaway! You should enter too http://bit.ly/hvXxyJ"
  5. Add Peace, Love & Bagels to your blogroll
Also, please make sure I have some way of contacting you, either by leaving your email address or blog URL (my comment application should already let you do this - just MAKE SURE you do). I must be able to get in touch with you to win.

For shipping purposes, only US/Canada residents are eligible for this giveaway.

You will have until next Wednesday (March 30th) at 11:59 pm EST to enter and the winner will be announced on Friday, April 1st (a.k.a. the real beginning of spring...the Tribe Home Opener!)


Anatomy of a Training Run: Hydration Edition


Since last night was my first attempt at running with my new CamelBak on my back, I thought it was a good time to expand my Anatomy of a Training Run series to include a post about hydration.

I've tried all kinds of ways to hydrate on my longer training runs: handheld water bottles, Fuel Belt, CamelBak...even driving the route before running and placing water bottles every so often. I'm going to review each of these hydration methods for you and tell you which one that I like the best.

Disclaimer: All opinions in this post are my own and based on my own experiences with these products. I was not compensated by the manufacturers of the following products in any way. 

the handheld water bottle

This was my first choice for running hydration when I was training for my first marathon. I didn't think I could stand wearing a fuel belt, but didn't know how else I was going to be able to get water on my runs. I quickly found out there are many downsides to this method:
  • Having to physically hold the water bottle in one hand (my hands were not created equal and I tend to use my right side more often). It can get a bit uncomfortable
  • My particular water bottle only holds 12 oz. of water. Not enough on a 15 mile run...found that one out the hard way!
That being said, this method is good for longer, short runs (which is anywhere from 45 minutes to 1.5 hours for me)

the Fuel Belt

It took me a long time to warm up to the idea of wearing a fuel belt, but during training for my first marathon I needed to figure out a way to stay hydrated for 20-mile training runs. It honestly wasn't as bad as I thought it would be. The downside was I had to carry all that water on my hips. After a few miles, you get used to it though. The upsides?
  • There was definitely enough water to get me through 20 miles, mine held 4-10 oz. bottles.
  • There's a pocket at the front to hold long run necessities: GU packs, ID, band-aids, etc. 
Given all that, Brandon and I have been taking the fuel belt out on our long runs, and for two people it will only get you through about 13 miles. 

the CamelBak

Yesterday was my first time using a CamelBak, but the impetus in buying one was two-fold: for marathon training and for our BikeMS training (speaking of which, have you donated to Team Baby Got Bike? I'll send you coookkkiesss!!) Anyway, it definitely holds enough water to get me through those extra long training runs. Cons:
  • Carrying 1.5L (depending on the size of your bladder) on your back for mucho mileage
  • Extra back sweat and the potential for new places to chafe. I didn't experience any new chafing because it's still to cold to wear sleeveless shirts, but I can see this potentially being an issue when it's warmer out
  • The water left in the tube freezes in sub-freezing temps and you can't really get water out adequately. Had that problem yesterday. 
  • The swishy water sound made me think I needed to pee. You get used to it though.
Still, I really liked not having to carry anything in my hands or on my hips. I was thrown off by all the noise at first, but I had not filled my bladder completely, which would probably help that. 

the water bottle 
(dropped in strategic places along training route)

This one takes a little planning on the runner's part. The one and only time I placed water bottles along my running route was when I went on an 18-mile training run during my Akron Marathon training (my long run the week before went sorely awry because I didn't have enough water with me). I drove my route the night before and put down water bottles at about every 4-5 miles. The plus side of this is there is plenty of water, and it simulates the water stations at the race. The downsides:
  • Disposing of the water bottles is often not very environmentally friendly, unless you know where there are trash cans along your running route
  • For me, I placed the bottles too close together and sometimes I still had water in one bottle when I got to the next one. This lends to water wasting because I found myself either throwing out my water bottles early or skipping the next bottle altogether - not very economical.
  • It's a lot of extra work to drive the route beforehand, and if you hit any trails you might be S.O.L.
Ok folks, that's my assessment of different ways to fuel on my long runs. There are good and bad points about all of them but all of the cons are outweighed by the serious need for water during those hot summer months. So which is my favorite? 

the envelope please...

...and the winner is:
my CamelBak!

I think the amount of water this holds, plus it's versatility outweighs all the cons. I can still pack snacks and my ID, cell phone, whatever else, with me with minimal annoyance. I can take it on long bike rides. I can take it on long runs. I already have a way to ameliorate chafing (product review coming soon!) so I'm not too worried about wearing sleeveless running shirts with it. As for that swishing water sound? I got used to it within a mile or so...I'm not to worried about running 20. I imagine I'll forget about it all together if it's swishing for that long. 

What is your favorite way to hydrate during endurance execises? 


Did you miss the other Anatomy of a Training Run posts? Here they are:

  • The Run/Walk Run
  • The Tempo Run
  • The Yasso 800
Also, be on the lookout for my first PL&B giveaway!!!

Peace, Love & Bagels, 

Thursday, March 24, 2011

Homemade Yogurt

First off, I got so many amazing comments on yesterday's post. Thank you all! I am so blessed that I have been exposed to so many wonderful people who love Cleveland more than I thought was even possible. People like you all are definitely what makes this city such an amazing place to live. Thank you!


Now, let's make some yogurt!

Disclaimer: I haven't had any success with making yogurt without a yogurt maker. That being said, it can be done. If you don't have a yogurt maker, follow directions here, or here.

or here.

Anyway, I have tried the crock pot method and the oven method (let me tell you, it helps if you have a pilot light in the oven) but I finally caved and bought a yogurt maker - because both of those methods are much more work (call me lazy, it's okay). 

Making yogurt at home is far and away more economical than buying it. I can make a week's worth of yogurt with less than a half gallon of milk - which probably amounts to less than $3.00 although if you're me, you buy your milk from the farmer's market for $3.50 per half gallon. According to suite101.com, yogurt can cost upwards of $.017 per ounce, while milk hovers around $.05 per ounce (we're talking organic, mind you). So do the math. 

Oh, not to mention the environmental cost of having all those yogurt containers filling up landfills! I love homemade yogurt.

All you really need is milk and a starter (better known as the commercially available yogurt of your choice).

Using the ratio 1 tablespoon of yogurt starter for every 500mL of milk, you can make any amount of yogurt you want. For my yogurt maker, they say to use the amount of milk that would fill up the seven jars it comes with and one jar full of starter. 

What you need is: 
  • a yogurt starter (go to store and buy a serving of plain yogurt)
  • milk, any type
  • dry milk powder, as a thickener (optional)
  • flavorings (also optional)
  • thermometer
What you need to do:
  • In a saucepan, slowly heat the milk until it hits 180 degrees (Fahrenheit). Stir every now and then with a whisk. Make sure you watch the temp, because it can heat up pretty quickly and you don't want to burn the milk. It will be just about ready to boil at 180 deg. If you pay attention to anything in this process, it should be this step.
  • Let the milk cool back down to about room temperature. It can still be warm, but if you do the wrist test (like with a baby bottle) it shouldn't feel warm. 
  • Mix the starter completely into the milk. This might be easiest if you use about half a cup of your warmed milk and mix it with all the starter to essentially dissolve the starter in the milk THEN pour it into the saucepan with the rest of the milk. Mix it in completely!
  • Pour into yogurt maker according to instructions (or find a way to insulate it until it becomes yogurty - 8-10 hours)


A few notes:
  • I like to strain my yogurt through a coffee filter for about an hour before eating it, so it's thicker and creamier. Also because I don't really care for the whey. 
  • Adding milk powder to your milk is supposed to make the yogurt creamier, but I haven't tried this so I can't speak intelligently on it.
  • Using different types of yogurt for starters (Stonyfield Farms, Fage, Chobani) will produce different results as far as flavor, creaminess and setting time. So will using different types of milk (whole, 2%, skim). Try a few combos and figure out what your fave is!
This was my own version of fruit on the bottom yogurt - Fruit on the Bottom Mango Yogurt!!


This is yet another step in the right direction to one of my 2011 goals: make things that I would normally buy at the grocery store!

It's time for my afternoon snack...homemade yogurt with diced mango and granola!!!

Peace, Love & Bagels,


Wednesday, March 23, 2011

Home Sweet CLE: A Tribute to CLE Bloggers

(source)

I spent a lot of time this morning pondering the various things I wanted to post today, but after scrolling through several blogs in my Google reader, I settled on writing a post on the many reasons I've come to love Cleveland. More importantly, I wanted to make this a tribute to the CLE blogging scene. Because it. Is. Awesome.

I have been in Ohio for the past two and a half years, but only moved up to the east side of Cleveland last October, when I moved in with Brandon. So up until then, I stuck primarily to the Akron area. While I was enjoying the spoils of living basically right in the Cuyahoga Valley National Park, I was totally missing out on all that is awesome in Cleveland.

My best source for finding out what's going on in this awesome city is Cleveland's bloggers!!! So, CLEbloggers, I'm so sorry if I leave you out of this post in some way shape or form, but I'm still in the process of discovering all of the great bloggers out there. Please forgive me!

Alicia is always my first stop to see what's going on around here. Her latest Ten Things Tuesday post chronicles a lot of upcoming events in Cleveland. From the Cleveland International Film Festival (which I definitely plan to attend this year) to the next Emerging Chefs event (which I also plan to go to someday) - Alicia knows all when it comes to where to be in CLE! Unfortunately, I won't be attending this month's Ohio Blogging Association Cleveland meet-up, but if you can go I highly recommend it - they're doing a volunteer night at the Cleveland Foodbank that's sure to be a rewarding experience.

If I ever need motivation to get my butt out the door to exercise, I check out what Kali, Katie, Heather, or Jessica is up to. It's always nice to be able to empathize with others on the training end of things, seeing as we're all getting the same weather, running in the same races and stumbling across similar road blocks.

You should probably know that part of the reason I got started blogging was because I was obsessed with food blogs...searching for recipes is my favorite procrastination activity! Personally, one of the best places to find new recipes are from local bloggers, because we have to work with what is available to us - whatever is in season right now, in Northeast Ohio. Not only that, but there are some restaurant gems in this city that I had no idea even existed had it not been for some of the best CLE food bloggers: the one and only Chubby Cook, Hungry in Cleveland, Cleveland Foodie, Cleveland Food and Brews...to name a few.

I don't even have the words to explain how quickly blogging has become an important part of my life here and  has given me access to innumerable resources from blends that I have and have not met yet. Here's a list of some other Cleveland bloggers that are a daily presence in my google reader (and whom I lovingly follow/read instead of being productive):

Cleveland Dog Blog fun fact: Chris and I have both bounced between living in Hoboken, NJ and Cleveland/Akron!
Cleveland Food Goddess
Cooker Girl
FireSide Symphony I might be a little biased, but this kid is kind of awesome. He sings some sweet tunes too!
Fun Playing with Food
Happiness is a Hot Pierogi (Brandon, how do we pronounce this???)
iheartcleveland.com
kli:vlend
So I Married A Chef
The Daily Downward Dog I'll be taking one of Maria's yoga classes soon! I cannot wait!
The Dawg's Dish
WhyCLE? Who, by the way, has an awesome CLE blogroll - definitely check it out!

Okie doke, friends - just a little insight into some of the many reason I have quickly fallen in love with Cleveland (and it's bloggers, is that weird?) Even if I sometimes hate the weather. Even if I curse going out to run in the snow. Even if we basically have to give Pele' a bath every time he comes in from playing outside because he's so muddy.

I [heart] CLE!

Oh, and I know I am missing some very awesome blogs. And let's be real, I could always use another reason to spend hours reading blogs before I actually start on any real work when I get to my office in the mornings. So please...if you can think of anyone I'm missing let me know they're out there!

Love, peace, chicken grease (thought I'd change it up),


p.s. T-minus 9.5 days until the Tribe home opener....Let's Go Indians!

Tuesday, March 22, 2011

Sprouted Wheat Crackers


Anyone need a good recipe for a tea party???

Foodbuzz decided to get in on Kelly Ripa's Tea Party For A Cause, where on Kelly Confidential, you can select a perfect tea party outfit for Kelly's Tea Party for a Cause. When you do, Electrolux will donate $1 to the Ovarian Cancer Research Fund (please head over there if you want to help out!) So, Electrolux and Foodbuzz are partnering to host a Top 9 Tea Party Takeover this Friday, to raise money for Ovarian Cancer Research. For every perfect tea part recipe posted by a Foodbuzz Featured Publisher, Foodbuzz will donate $50 to the Ovarian Cancer Research Fund. 

Definitely sounds like something I want to participate in! Here is my contribution to ovarian cancer research: 

Sprouted Wheat Crackers!


adapted from Angela from Oh She Glows  recipe for Homemade Wheat Thins

ingredients: 
  • 1 1/4 cups sprouted wheat flour*
  • 1 tbsp sugar
  • 1/2 tsp salt, plus extra for sprinkling on top
  • 1 tsp wasabi powder
  • 4 tbsp butter
  • 1/4 cup + 2 tbsp water
  • 1/4 tsp vanilla 
directions:
  1. Preheat oven to 400 degrees. Line two baking sheets with parchment.
  2. In a large bowl, whisk together dry ingredients (flour, sugar, salt and wasabi powder).
  3. Cut butter into flour mixture until crumbly (I used two forks to do this). Mix water and vanilla and pour into flour/butter mixture, stir until it comes together. Then get in there with your hands and squeeze away until the dough really comes together. Add a tiny bit of water if it seems too dry.
  4. Split the dough in half (or any workable amount) and roll out on a floured surface until very thin, maybe about 1/16 inch thick. Before your last roll, sprinkle salt, sesame seeds or whatever you want to top your crackers with and roll it into the dough. Cut using a pizza cutter, into any shape/design your little heart desires. Transfer crackers to baking sheet and repeat with the rest of the dough.
  5. Bake 8-10 minutes, rotating pan halfway through baking. Mine only took 8 minutes, but it might take more if you use a baking mat. Watch them, as they will burn quickly. Let cool completely and enjoy with some hummus or your favorite dip! Store in an air-tight container.
Makes enough crackers to fill two baking sheets.

*NOTE: wondering about sprouted wheat flour? You can always sub regular flour in here, but sprouted is much more fun and has a different nutritional profile, as sprouting awakens the grain! I did the sprouting/grinding myself. Just get some wheat berries, sprout them in a jar or sprouter and dehydrate (using a dehydrator, or lots of sun) for 4-6 hours, until they're completely dry. Then use your coffee or spice grinder to grind the sprouted wheat berries into flour. It takes a bit of advanced planning to do this so start a few days before you want to make your crackers. Oh, and you can sometimes get sprouted flour at the health food store.


I was super happy with the way these crackers turned out! Crunchy and salty. The wasabi powder didn't make it spicy at all - just added a little depth to the flavor. It was great with our South Euclid made Dill Hummus! I wanted to make some of my almond hummus, but we had several tubs in the fridge already. If you have a party (a tea party perhaps?) that you need to supply with some munchies - these crackers are the bees knees

Peace, Love & Bagels,

Monday, March 21, 2011

Marathon Monday: Training Week #11

Phew! What an awesome week for training! We actually got on our bikes last week and got to enjoy some warmer weather for most of our runs. Last week's workouts went something like this:

Monday - rest

Tuesday - 5 miles easy. This was a run in the rain, which kind of sucked, but got better over the course of the run. We started out heading right into the rain and getting pelleted in the face by it, but by the end it was at our backs and (at least my) body temperature had gone up enough to not be bothered too much by the cold rain. It was good and wet though, that I could have done without.

Wednesday - 10 mile bike ride! It was warm/sunny enough on Wednesday to take out our bikes, so we took the little bike/walk trail that goes along Shaker down into Pepper Pike and back. We also resolved to take our bikes to the grocery store (well, to Trader Joe's) when we needed to go. I am so happy it's finally turning into spring!

Thursday - speedwork, 3x1600m at 8:48 pace with 800 jogs in between, total 5.75 miles. This was our first bout with mile repeats and it went really, really well. Brandon and I were both feeling strong, even though I was initially worried about switching from 800's to 1600's. It was a good move, and something that I think will benefit us a lot. The mile splits were in 8:46, 8:46 and 8:44. I'm still pretty impressed by the fact that it didn't feel like complete misery running that quickly. I haven't run anywhere near an 8 minute mile since I was in college (and playing lacrosse, mind you.)

Friday - rest/walk the doggie.

Saturday - 13.1 miles. We had only planned to run 12 miles, but since we did 13 two weeks ago, we decided to just go for it. Brandon and I are both in agreement; the second time we were in a much better head space than we were the first time around. We planned our very own half marathon route:
This is the second time we've run this route. I am loving it! Lots of different things to run by. We start in the more "iffy" neighborhoods around us (I say "iffy" because we encountered several cops the first time we ran through there) and then get to run through Shaker and admire all those incredible houses, then around the lakes to take in some of the beautiful scenery the east side has to offer. Then you get a few more crowded roads and a college before heading home! It's fun and a pretty flat route. I am a fan!

Sunday - rest/work around the house. 

This coming week (week 11!) is going to be another good one. Hopefully we'll get another chance to get out on the bikes. This weeks schedule:


We're kicking it up this week, with Brandon's first 14-miler EVER! (Another reason we're both glad we ran 13 miles on Saturday instead of 12). I want to work in a bunch of good cross training this week too. I have kind of abandoned my push-ups, sit-ups and squats because I think it takes me too long to do all three...and I get bored easily with them. I was reading some older posts on Heather's blog and got a great idea which seemed like a much better way for me to work those things into my routine, without getting bored: play Hit the Deck! I will let you know how that goes when I actually try it!

Happy Spring everybody!!!


Thursday, March 17, 2011

Blogger Interview + a Recipe!

Happy St. Patty's Day! I hope everyone is staying safe and green today (although, I know...it's not easy being green!)

Today I have a real treat for you guys...an interview with Lindsay from Happy Herbivore! Lindsay is doing a blog book tour to promote her new cookbook, so I decided to take the opportunity to have her answer a few questions for all the Peace, Love & Bagels readers out there!  I've been following Happy Herbivore since I was introduced to the blogosphere. I absolutely love her low-fat and fat-free, vegan recipes and have tried many of them myself (this is one of my favorites!)

Lindsay was also awesome enough to let you all in on a sneak peak recipe from her book! Don't forget to check out her Black Bean Burgers at the bottom of this post!!

But First, a little more about Lindsay...


Lindsay S. Nixon is a rising star in the culinary world, praised for her ability to use everyday ingredients to create healthy, low fat recipes that taste just as delicious as they are nutritious. Lindsay's recipes have been featured in Vegetarian Times, Women's Health Magazine and on The Huffington Post. Lindsay is also a consulting chef at La Samanna, a luxury resort and four-star restaurant in the French West Indies. You can learn more about Lindsay and sample some of her recipes at happyherbivore.com

Now, onto the interview: 

Did you grow up in a family that practiced a plant-based, vegan or even a "healthy" lifestyle and how has it influenced you as an adult?
I grew up largely a vegetarian out of a love for animals, but it was against the wishes and desires of my entire family, who took great pride in feeding me meat (saying it was soy) or things with meat in it (like soup made from chicken broth) and not telling me.


Thankfully, they've all come around and are at least supportive. My parents even adopted meatless mondays, and my sister is vegan too now. It's been a long road, for sure.

What made you decide to eat a solely vegan diet?

Originally I went vegan because I'd heard it would clear my skin, help me lose weight, give me more energy and fix some digestive issues --- and it did! But the reasons I stay vegan run much deeper. I'm moved by the plight of farm animals, the environmental impact, the health benefits --- there are so many reasons why I continue to be vegan.

Having published a cookbook, I'm sure you know a thing or two about being very busy. What are your some tips you have for navigating a hectic day when you want to do it all?
Time management. I can't stress how crucial that is--- I really sit down and plan my day. I assign things like chores and exercise the way people schedule meetings or dates

What made you decide to publish The Happy Herbivore Cookbook? 
It's a story of being in the right place at the right time with the right experience. I wasn't sure I even wanted to write a cookbook, but then I (by pure luck) met a great publisher who happened to be looking for someone like me to write a cookbook -- and the rest is history. We were a match made in heaven.

What goes into publishing a cookbook?
Oh gosh, there is so much work involved. First you need to write the book -- the recipes, the table of contents, index, glossary -- then there is the layout, and taking pictures, then there are several edits of the book, then there is trying to decide on the cover and title (hardest part) and double-checking and cross checking to get page numbers... it takes about a year all in all.

What tips do you have for PL&B readers who might be thinking about putting their recipe collection in print?
Don't romanticize it too much. Writing a book is a lot of hard work and it's not particularly lucrative... you have to do it because you love it. Also keep in mind that there are a lot of vegan cookbooks out there now, so the market is very competitive. Most publishers are looking for a "new idea" and someone with a lot of notoriety-- a strong fan base.

What is your favorite recipe in The Happy Herbivore Cookbook?
I have a lot of favorites that I kind of go between. Lately I can't seem to get enough of the nachos, though a week ago I was gaga for cornbread and the week before that portobello steaks.

Any closing thoughts for the PL&B readers?
Thank you for this opportunity -- and my favorite bagel is a whole wheat everything with tofu cream cheese and olives!


Black Bean Burgers (makes 3) - I love a good and quick meal, and this burger fits the bill perfectly. 
15-ounce can black beans, drained and rinsed
1/4 c fresh cilantro, minced
1 tsp ground cumin
1/2 tsp dried oregano
cayenne, salt and pepper to taste
whole-wheat breadcrumbs or instant oats
whole-wheat buns
Preheat oven to 350F. Grease a cookie sheet or line with parchment paper and set aside. Pulse beans in a food processor until mashed well or alternatively, mash with a fork. Transfer to a mixing bowl and combine with cilantro and spices. Add breadcrumbs or oats as necessary until the mixture can be handled and isn't terribly sticky, about 1/4 c. If after 1/4 c. it's still too sticky, refrigerate for 5 to 10 minutes. Shape mixture into 3 patties. Lightly spray with cooking spray (optional) and bake 7 minutes. Flip and re-spray (optional) and bake another 7 to 10 minutes until thoroughly warm and crisp on the outside. Serve immediately. Because there is no oil, these patties dry out if you let them sit.

Thanks Lindsay! Keep up the great work and best of luck with your lovely cookbook!!
Peace, Love & Bagels,

Wednesday, March 16, 2011

My Body and Me

"Life is not a journey to the grave with the intention of arriving safely in a pretty and well-preserved body, but rather to skid in broadside, thoroughly used up, totally worn out, and loudly proclaiming 'wow, what a ride!'"


Let me take a minute for a disclaimer, this is a pretty heavy and probably my most starkly honest post to date. I write about a lot of things, but I haven't been brave enough to tell my lovely readers about my self doubts. Since Peace, Love & Bagels is a judgement-free zone, I am hoping that you all understand that sometimes this blog will be used as a forum to put it all out there, sort out my feelings and [hopefully] move past them. The Zac Brown Band song "Let It Go" comes to mind right now...

So we're about a week into Lent, and our promise to give up all things booze and desserts (mind you, we are keeping our promise on Sundays too!) I have been in this real funk lately, with regards to my body image. Not how my body is perceived by others (because lord knows I couldn't care less) but how I perceive my body and how my body feels to me. I am bringing this up in terms of our Lenten promise because secretly, down deep inside, I hope this promise brings me out of the funk. I hope it helps me feel better in my own skin.

The first thing to note is how much I appreciate Brandon constantly reminding me of how beautiful I am. It feels good to know someone feels that way, even when I don't. Brandon, I truly love and appreciate everything about you, but these feelings come from within me - so I hope you don't feel responsible for them.

In giving up alcohol, I have made a promise to replace my nightly glass (or three) of wine with it's more healthy cousin; water. This seems to be the easy part for me (although I'm sure Brandon will beg to differ). In giving up desserts, my goal was to replace my craving for afternoon or post-dinner sweets with things like fruits with yogurt or chia seed pudding. Instead, I've been filling that sugary void in my diet with sugar's evil step-mom; salty, processed foods. (Side note: I have a step-mom but she is by no means "evil". That wasn't meant to be a crack at step-moms. Love you Ingrid!) 


So I think I'm going through a little bit of a "detox" right now that is making me feel nothing but bleh. So detox + increased intake of sodium laden, processed foods = Becca not feeling too great about herself.

And I'm here to tell you today that I'm not going to let a week of indulgence turn into a lifetime. I'm not going to let these feelings get the better of me today...and even if I have some hiccups tomorrow, I won't let those feelings get the better of me. Why? Because Zac Brown said something like this:

"Save your strength for things that you can change
forget the ones you can't
you've gotta let it go"

This is a feeling that I can change! I'm going to enhance the promise I made for Lent; not only am I not going to consume desserts or alcohol, but everything that goes into my body will go in slowly and with intention. Not because I'm bored, not because there is still food on my plate, but because it serves a purpose. That purpose might be to fuel myself, to share food that I've cooked with others, to spend time with friends and family over a meal...whatever it may be, it's intentional. (Sometime, remind me to tell you the story about excreting waste with intention). 

Since not drinking has somehow afforded me the extra time to do things like vacuuming the entire house, Saturday night dinner/movie dates and Sunday morning yoga practices, I am going to take advantage of this opportunity to prepare home cooked meals from whole foods and try not to resort to easy, processed foods. I am going to make good on my promise to recalibrate my body by also recalibrating my mind and my soul while I'm at it. 

Thanks guys, for giving me a second to reflect on my self doubts and renew my promise to myself and to the big guy upstairs (big woman upstairs??). Thanks for helping me keep moving forward!

Peace, Love & Bagels,


p.s. after writing this post, I read Heather's post on reactive eating. Her simple plan to ask "do I want to eat this" and "why?" is a good start down the path of intentional eating. Thank you Heather!