First off, I got so many amazing comments on yesterday's post. Thank you all! I am so blessed that I have been exposed to so many wonderful people who love Cleveland more than I thought was even possible. People like you all are definitely what makes this city such an amazing place to live. Thank you!
Now, let's make some yogurt!
Disclaimer: I haven't had any success with making yogurt without a yogurt maker. That being said, it can be done. If you don't have a yogurt maker, follow directions here, or here.
or here.
Anyway, I have tried the crock pot method and the oven method (let me tell you, it helps if you have a pilot light in the oven) but I finally caved and bought a yogurt maker - because both of those methods are much more work (call me lazy, it's okay).
Making yogurt at home is far and away more economical than buying it. I can make a week's worth of yogurt with less than a half gallon of milk - which probably amounts to less than $3.00 although if you're me, you buy your milk from the farmer's market for $3.50 per half gallon. According to suite101.com, yogurt can cost upwards of $.017 per ounce, while milk hovers around $.05 per ounce (we're talking organic, mind you). So do the math.
Oh, not to mention the environmental cost of having all those yogurt containers filling up landfills! I love homemade yogurt.
All you really need is milk and a starter (better known as the commercially available yogurt of your choice).
Using the ratio 1 tablespoon of yogurt starter for every 500mL of milk, you can make any amount of yogurt you want. For my yogurt maker, they say to use the amount of milk that would fill up the seven jars it comes with and one jar full of starter.
What you need is:
- a yogurt starter (go to store and buy a serving of plain yogurt)
- milk, any type
- dry milk powder, as a thickener (optional)
- flavorings (also optional)
- thermometer
What you need to do:
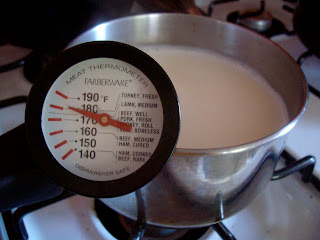
- In a saucepan, slowly heat the milk until it hits 180 degrees (Fahrenheit). Stir every now and then with a whisk. Make sure you watch the temp, because it can heat up pretty quickly and you don't want to burn the milk. It will be just about ready to boil at 180 deg. If you pay attention to anything in this process, it should be this step.
- Let the milk cool back down to about room temperature. It can still be warm, but if you do the wrist test (like with a baby bottle) it shouldn't feel warm.
- Mix the starter completely into the milk. This might be easiest if you use about half a cup of your warmed milk and mix it with all the starter to essentially dissolve the starter in the milk THEN pour it into the saucepan with the rest of the milk. Mix it in completely!
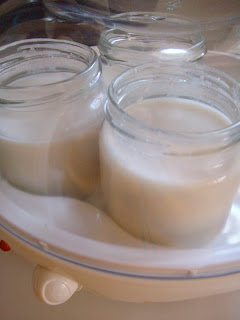
- Pour into yogurt maker according to instructions (or find a way to insulate it until it becomes yogurty - 8-10 hours)
A few notes:
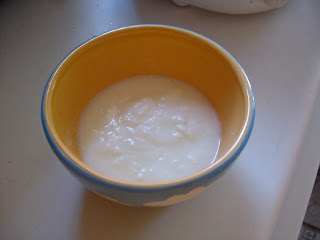
- I like to strain my yogurt through a coffee filter for about an hour before eating it, so it's thicker and creamier. Also because I don't really care for the whey.
- Adding milk powder to your milk is supposed to make the yogurt creamier, but I haven't tried this so I can't speak intelligently on it.
- Using different types of yogurt for starters (Stonyfield Farms, Fage, Chobani) will produce different results as far as flavor, creaminess and setting time. So will using different types of milk (whole, 2%, skim). Try a few combos and figure out what your fave is!
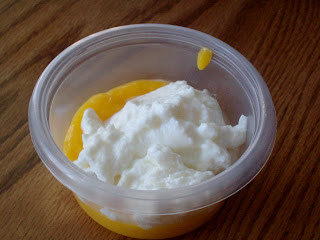
This was my own version of fruit on the bottom yogurt - Fruit on the Bottom Mango Yogurt!!
This is yet another step in the right direction to one of my 2011 goals: make things that I would normally buy at the grocery store!
It's time for my afternoon snack...homemade yogurt with diced mango and granola!!!
Peace, Love & Bagels,